So I thought it might be time for a project post?
I saw a blanket tutorial on a blog that I follow long before I was pregnant and I knew I wanted to make it someday. After I found out I was having a girl I got excited to start some crafts and I knew this blanket was one I wanted to make. However, it was not easy. It was a long process and then my back only became worse and I was not able to finish it without the help of James and my wonderful neighbor.
1. I originally wanted to use this fabric. But you need 3-4 different colors to make the blanket and I was just not loving my choices.
2. So I went with this fabric. I had a yard of it already, but somewhere along the way I tore some of it off for something else which made it a little short of a yard which sort of bugged me, but I figured it would be ok.
3. I either didn't take pictures of step 2a or I lost them somewhere, but I ironed all the fabrics and bought some spray craft adhesive, like the blog lady used, and I sprayed all the fabrics together so that when it was sewn they wouldn't shift as much. Then I sewed my first line down the diagonal of the blanket.
4. I continued doing so about every 1/2 inch apart. This was really boring and time consuming! The lines are definitely not perfect either. About a fourth of the way through (and a few weeks later) I couldn't sit anymore and I asked James to help me finish. He was able to sew the rest of the lines across the blanket.
5. Once all the lines were sewn I began to cut all the fabrics except for the patterned fabric on the front side. BUT this was too hard on my back. I was hunching over to do it. So my wonderful husband took over and cut almost the entire blanket.
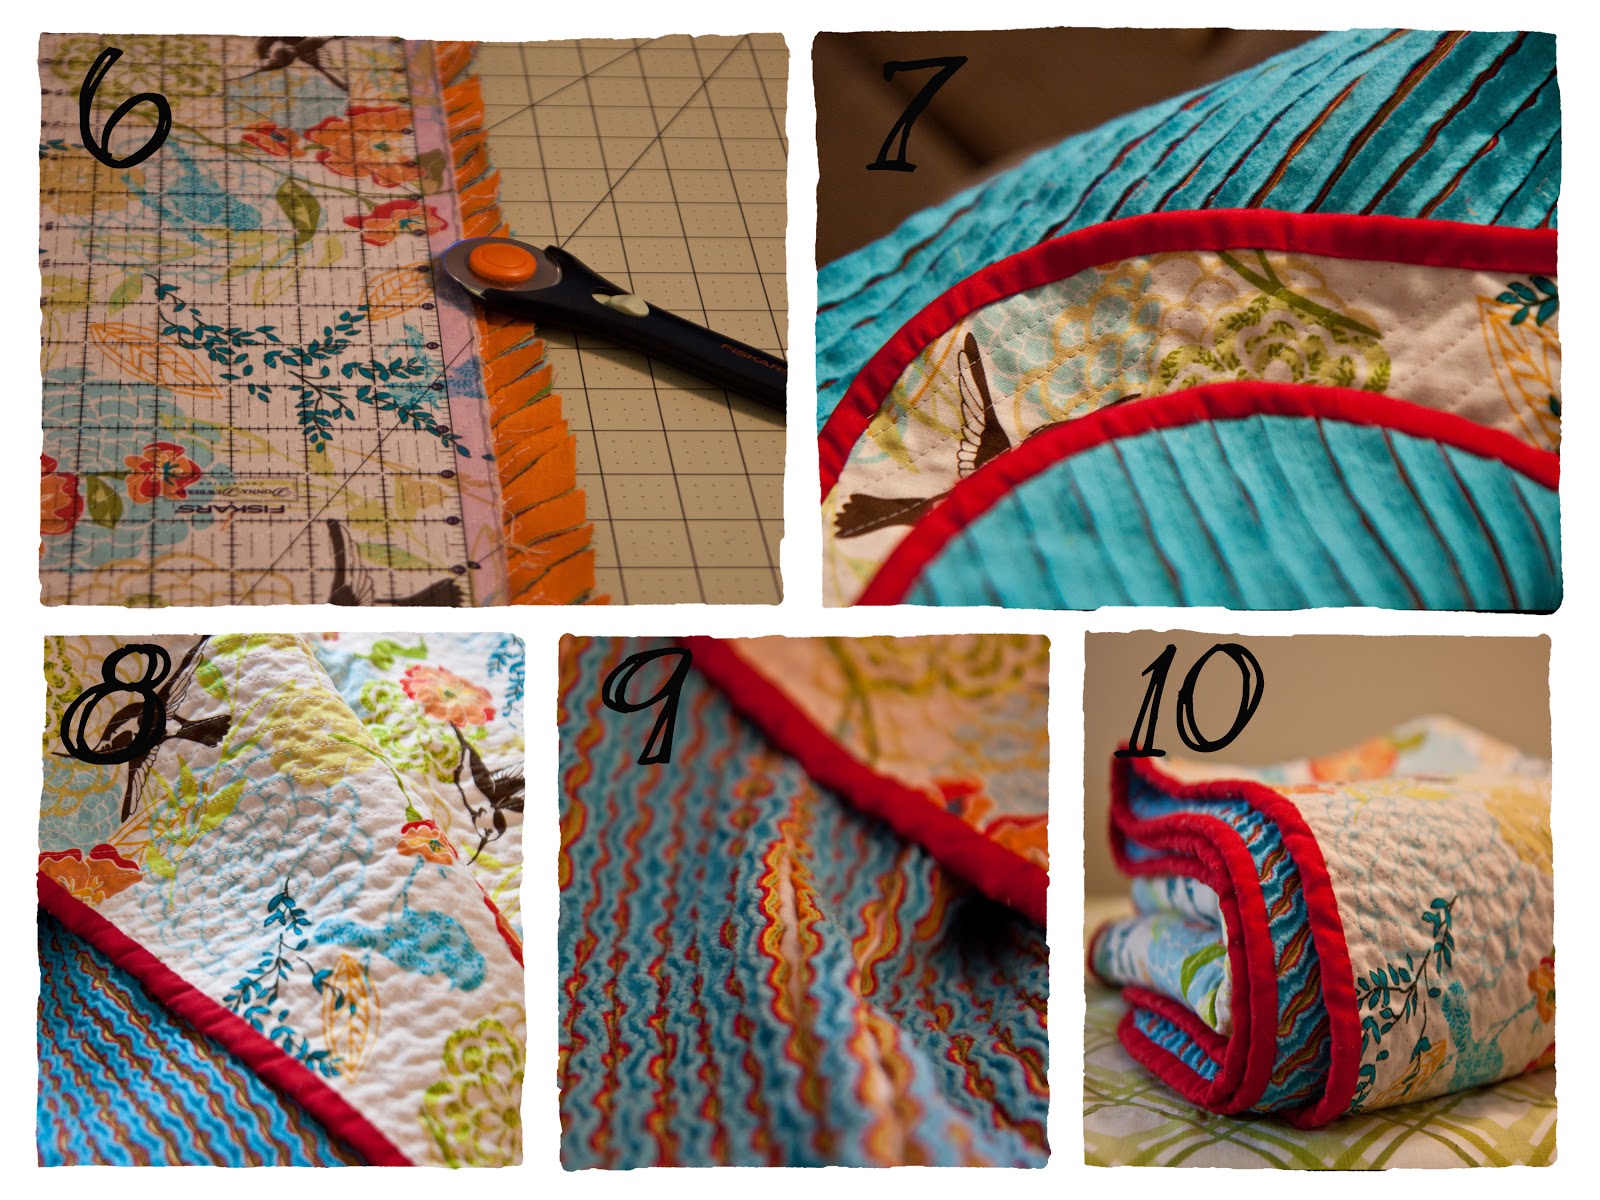
6. Then it was time to cut off the excess fabric on the sides. I had a lot because the patterned fabric wasn't as long/wide as the color fabrics and when you sew some shifting occurs.
7. Then it was time to sew the binding. I had never done binding before and I bought the packaged kind at Joanns, like the blog lady used, but my neighbor said she could make some which she thought would be better. I just bought red cotton fabric and she cut it and then so graciously sewed one side of it on. She taught me how to hand stitch the other side down which I was able to do because I could lay down and hand stitch.
8 & 9. Then it was time for the best part, washing it. This is where the magic begins. The whole point of sewing on the diagonal is so that it frays in the washing machine and looks like chenille.
10. It really turned out awesome and is nice and heavy. Perfect for a floor blankie too. I should have taken a picture of it all laid out, but you get the point.
Original tutorial can be found
here